
How to install HDPE electrofusion fittings?
Installing HDPE (High-Density Polyethylene) electrofusion fittings requires careful attention to detail and adherence to proper procedures. Here’s a step-by-step guide on how to install HDPE electrofusion fittings:
Gather the necessary tools and materials
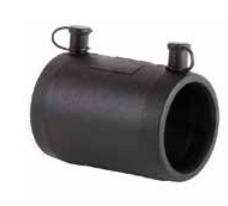
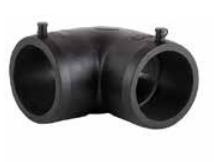
- HDPE pipe and electrofusion fittings
- Electrofusion welding machine
- Clamps or supports
- Clean cloth or rag
- Calibrated electrofusion control box
- Pipe cutters or saw
- Cut the HDPE pipe: Measure and mark the pipe at the required length using a marker or pencil. Then, use pipe cutters or a saw to make a clean and square cut. Ensure that the pipe ends are smooth and free from burrs.
- Prepare the fittings: Ensure that the electrofusion fittings are clean and undamaged. Inspect the fusion surfaces of both the fitting and the pipe for any defects or contaminants. Remove any dirt, debris, or moisture using a clean cloth or rag.
- Assemble the fittings: Insert the pipe into the fitting socket until it reaches the marked insertion depth. Make sure the pipe is fully engaged in the fitting to ensure a proper fusion joint.
- Connect the welding leads: Connect the welding leads from the electrofusion control box to the appropriate terminals on the fitting and pipe. Follow the manufacturer’s instructions for the specific electrofusion welding machine you are using.
- Set the fusion parameters: Use the calibrated electrofusion control box to set the correct fusion parameters such as voltage, time, and amperage. These parameters may vary depending on the pipe size, fitting type, and manufacturer recommendations.
- Perform the fusion process: Once the fusion parameters are set, initiate the fusion process according to the manufacturer’s guidelines. The electrofusion welding machine will apply heat and pressure to melt the surfaces of the pipe and fitting, creating a strong and secure fusion joint.
- Allow the joint to cool: After the fusion process is complete, allow the joint to cool for the specified cooling time recommended by the manufacturer. Avoid applying any stress or pressure on the joint during this cooling period.
- Inspect the joint: After the joint has cooled, visually inspect it for any signs of irregularities, such as gaps, voids, or leaks. If any issues are detected, consult the manufacturer’s guidelines for remedial actions.
- Repeat the process: Continue the installation by repeating the above steps for each additional electrofusion fitting required in your pipeline system.
It’s essential to note that the specific procedures may vary depending on the manufacturer’s recommendations and the type of electrofusion fittings being used. Therefore, always refer to the manufacturer’s instructions and guidelines for the fittings and welding machine you are working with to ensure proper installation.